Drawing your own furry character (your “fursona”) is one of the most fun and rewarding parts of being in the furry fandom. Whether you want to make a reference sheet for a future fursuit, create badge art, design expressions for role-play, or simply bring your animal persona to life on paper or screen, learning how to draw a furry is much easier than most beginners think.
This complete 2026 guide is made for absolute beginners and early intermediates. It works for both traditional drawing (pencil & paper) and digital (Krita, Clip Studio Paint, Procreate, Photoshop, etc.). By the end you will know exactly how to draw a clean, expressive, recognizable furry character.
Step 1: Choose Your Species & Style (The Most Important First Decision)
Your species and style determine almost everything else.
Popular beginner-friendly species in 2026
- Wolf — strong expressions, lots of fur practice
- Fox — fluffy tail, pointed ears, very popular
- Cat — simple shapes, cute & expressive faces
- Deer — elegant antlers, graceful body lines
- Dragon — scales & wings (good for intermediate)
Choose a style
- Toony / cartoon — big eyes, simplified shapes, bold colors (easiest for beginners)
- Realistic — detailed fur, accurate anatomy (harder, more time-consuming)
- Kemono / anime — huge sparkling eyes, chibi proportions, pastel colors (very popular right now)
- Protogen / cyber — robotic parts, visor eyes (great for 2026 tech-furry trend)
Beginner recommendation: Start with toony style. It hides small mistakes and looks good even with basic skills.
Step 2: Gather Your Tools (Free & Low-Cost Options for 2026)
Traditional drawing
- Pencils: HB (light sketching) + 2B/4B (darker lines/shading)
- Eraser: kneaded eraser + precision eraser
- Paper: smooth sketchbook or Bristol board
- Fine liners: Sakura Pigma Micron 0.3–0.8 mm (for clean inking)
Digital drawing (free or cheap)
- Krita — 100% free, excellent furry brushes, layers, symmetry tool
- FireAlpaca / MediBang Paint — free, simple, good for beginners
- Clip Studio Paint — one-time purchase (~$50) or subscription, best furry community brushes
- Procreate — iPad only, $12.99 one-time, amazing for fur texture
Free furry brush packs (2026 recommendations)
- Search “furry fur brushes Krita” or “anthro texture pack” on DeviantArt, Gumroad, or itch.io
- Popular ones: “Fluffmaster” pack, “Furry Lineart” set, “Pony Fur” brushes
Step 3: Master Basic Furry Head Anatomy (This Is 70% of the Drawing)
Furry heads are human-like but stretched and animalized.
Step-by-step head construction (works for most species)
- Draw a circle for the cranium (main skull part).
- Draw a smaller circle or oval below it for the muzzle.
- Wolf/fox: long muzzle
- Cat: short muzzle
- Deer: medium length, sloped
- Draw a cross on the face for eye placement (eyes sit higher than human faces).
- Place large eyes (toony = half the head height; realistic = smaller).
- Add ears — tall & pointed for wolves/foxes, rounded for deer, triangles for cats.
- Draw the neck — wider than human to allow for fur volume.
- Add guidelines for fur direction: outward from center of face, longer on cheeks/neck.
Proportions tip Use the “Loomis method” for head (divide into thirds), then stretch the muzzle forward.
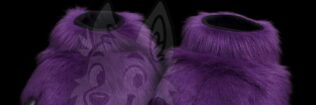
Step 4: Drawing Fur Texture (What Makes It Look “Furry”)
This is the magic step that turns a bald animal into a furry.
Basic fur drawing rules
- Short strokes near face/muzzle (direction outward)
- Longer, wavy strokes on cheeks, neck, chest
- Layer colors: base → mid-tone → highlights → shadows
- Use white for chest blaze, ear insides, muzzle accents
- Add small ear tufts, whiskers, nose shine
Digital technique
- Use textured brushes (fur scatter, chalk, grass)
- Layer modes: Multiply for shadows, Overlay/Screen for highlights
- Clip layers to base color so fur stays inside the lines
Traditional technique
- Light pencil strokes first
- Ink with varying line weight (thicker outside, thinner inside)
- Shade with hatching/cross-hatching for depth
Step 5: Body, Poses & Proportions
Basic anthro proportions
- Head = 1 unit
- Torso = 2–2.5 heads tall
- Legs = 3–4 heads tall (digitigrade = longer lower leg)
- Arms = reach mid-thigh
Beginner poses
- 3/4 front view (most flattering)
- Hands on hips or relaxed at sides
- Slight tail sway or ear tilt for personality
Digitigrade legs (animal stance)
- Bend knees backward
- Add calf/thigh padding shape
- Paw/hoof feet at bottom
Step 6: Hands, Feet, Tail & Accessories
- Hands: 4 fingers + thumb (paw pads optional)
- Feet: Plantigrade (human-like) or digitigrade (paw/hoof)
- Tail: Long & fluffy (fox/wolf), short & tufted (deer), expressive curves
- Accessories: collar, piercings, glasses, harness, clothing layers
Step 7: Coloring & Shading
Simple workflow
- Fill base color
- Add shadows (cooler tone, Multiply layer)
- Add highlights (warm tone, Screen/Overlay layer)
- Rim lighting (bright edge light)
- Color fur clumps individually for depth
Pro tip Use complementary colors for eyes/nose to make them pop (e.g., blue eyes → orange rim light).
Step 8: Inking, Final Polish & Export
- Ink with clean lines (digital: stabilizer on; traditional: fine liner)
- Vary line weight (thicker outside, thinner inside)
- Background: simple gradient or pattern
- Export high-res (300 DPI for printing ref sheets)
Common Mistakes & Quick Fixes
- Flat fur → add direction & layering
- Stiff pose → do 30-second gesture sketches first
- Wrong proportions → use Loomis head method + animal photo refs
- Overcomplicated design → keep first fursona simple
- Bad hands → practice paw tutorials separately
From Drawing to Fursuit – Next Steps
Once your furry drawing is finished:
- Turn it into a full reference sheet (front, back, side, expressions, paw details)
- Use it to commission a fursuit, badge, or plush
- Share on FurAffinity, X, Reddit r/furry, or Discord for feedback
Ready to turn your drawing into a real fursuit? We specialize in bringing 2D fursona art to 3D wearable suits — partials, fullsuits, heads, tails, accessories. Send us your drawing or character description and we’ll give you a fast, accurate quote.
faqs
No — start with basic shapes and animal references. Most beginners see big improvement in 1–3 months with daily practice.
Foxes, wolves, and cats — simple muzzles, ears, and fur patterns.