Deer fursuits are one of the most elegant and popular styles in the furry fandom. With their graceful antlers, large expressive eyes, soft browns and whites, and that classic forest-animal vibe, a well-made deer suit stands out at conventions, photoshoots, and meetups.
Whether you’re going for a realistic buck, a cute pastel doe, a kemono chibi deer, or a toony cartoon style, building your own deer fursuit is a rewarding (and much cheaper) alternative to commissioning one. This complete 2026 step-by-step guide is written for beginners – from total newbie to intermediate crafter – and covers everything: design, materials, head construction, body padding, fur work, hooves/tail, and final finishing.
By the end, you’ll have a realistic plan, cost estimate, and the confidence to start your own deer fursuit project.
1. Planning & Design – Create Your Deer Fursona (Week 1–4)
Every great fursuit starts with a clear fursona.
Steps:
- Decide your deer type: Whitetail, reindeer, fallow deer, roe deer, chital (spotted), or fantasy hybrid?
- Choose gender/presentation: buck (antlers), doe (no antlers or small ones), non-binary, etc.
- Pick colors: realistic (browns, tans, white underbelly, black nose/hooves) or stylized (pastel pinks, neons, galaxy patterns).
- Draw or commission a reference sheet (front, back, side, expressions, paw details).
- Minimum: 3 views + color palette.
- Tools: Free (Krita, FireAlpaca) or paid (Clip Studio Paint).
- Budget option: Ask a friend or use Fiverr/Artists Beware for $20–$80 ref sheet.
Cost so far: $0–$100 (ref sheet)
Pro Tip: Save realistic deer photos for reference (Pinterest, Google Images). Note ear shape, muzzle length, antler style, and hoof details early.
2. Gather Materials & Tools (Week 2–6)
You don’t need the most expensive stuff to start – focus on quality where it matters (fur, foam, eyes).
Essential Materials List (2026 Prices – USD approx.)
- Faux fur fabric (short/medium pile for face & body): 4–7 yards @ $18–$45/yard → $80–$300 (Best sources: specialty suppliers like FursuitCommissions.com fabric shop, Howl Fabrics, Big Z, or Etsy sellers with low-shed backing)
- Upholstery foam (1–2 inch thick for head & padding): 4–6 sq ft → $30–$80
- EVA foam (craft foam for structure/antlers): 5–10 sheets → $15–$40
- Plastic canvas or buckram (head base support): $10–$25
- Resin/plastic eyes (taxidermy or custom): $20–$80/pair
- Hot glue sticks (high-temp gun): 100-pack → $15
- E6000 or contact cement (fur glue): $10–$20
- Thread (heavy-duty upholstery): $10
- Velcro, elastic, zippers (closures): $15–$30
- Poly-fil or foam scraps (stuffing): $10–$30
- Paint (acrylic/airbrush for details): $20–$60
- Antler base (PVC pipe, wire, foam): $10–$40
Tools You Need:
- Sewing machine (or hand-sew for small parts)
- Hot glue gun + extra sticks
- Rotary cutter & self-healing mat
- Scissors (fabric + heavy-duty)
- Dremel or sandpaper (smoothing foam)
- Airbrush or paint brushes
- Measuring tape, marker, pins
Total estimated cost (DIY deer partial suit): $250–$800 (Head only: $150–$400 | Full partial with body: $400–$800)
3. Building the Head – The Most Important Part (Week 6–16)
The head defines 70% of the suit’s look.
Step-by-step deer head construction:
- Make the base
- Use a bucket/ball or plastic canvas pattern for basic shape.
- For deer: longer muzzle, narrower snout than wolf/toony styles.
- Cut EVA foam pieces for cheeks, brow ridge, and jawline. Hot glue together.
- Sculpt the foam
- Carve with a sharp knife/Dremel to create deer shape (sloped forehead, large eye sockets).
- Add foam for antler bases (two strong PVC pipes or wooden dowels glued in).
- Eyes
- Cut large oval eye holes.
- Install 3D taxidermy eyes or plastic domes + hand-painted pupils.
- Deer eyes: large, side-placed, gentle expression (use brown/amber with black pupil + white highlight).
- Mouth & Jaw
- Optional moving jaw: hinge with plastic canvas or leather.
- Add foam tongue and teeth for realism.
- Antlers
- Wire frame → wrap with foam → carve shape → cover with brown fur or paint.
- Realistic: branchy, textured. Cute: small rounded nubs.
- Furring the head
- Pattern fur pieces (use paper templates).
- Cut short-pile fur for face (tan/white), medium for neck.
- Glue in sections, stretch gently, trim seams with clippers.
- Add white muzzle blaze, dark nose, and ear tufts.
Time: 60–150 hours depending on detail level Common mistake: Not shaving fur seams – use clippers for invisible joins.
4. Ears, Antlers & Finishing Head Details (Week 16–20)
- Ears: Wire frame + foam core → fur cover → glue to head. Deer ears are long and upright.
- Inside ear fur: pink or white fluff.
- Paint details: airbrush shading on muzzle, nose leather texture.
- Whiskers: fishing line or thin wire.
5. Body Padding & Structure (Week 20–28)
Deer bodies are slim and graceful – avoid over-padding.
Options:
- Plantigrade (human stance): minimal leg padding
- Digitigrade (animal legs): thick calf padding + stilts/hooves
Steps:
- Pattern bodysuit from old clothes or use a commercial pattern.
- Sew base suit (spandex or lycra for stretch).
- Add foam padding to thighs/calves for digitigrade look.
- Cover with fur – use long pile on back, short on belly.
- Add white underbelly, brown sides, and dark dorsal stripe.
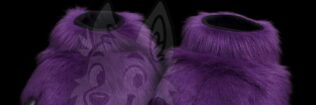
6. Hooves, Tail & Hands/Feet (Week 28–34)
- Hooves: EVA foam or resin bases → cover with black faux leather or vinyl. Add rubber sole for grip.
- Tail: Wire armature + foam → long fur cover → attach with belt loop. Deer tails are short & fluffy with white underside.
- Handpaws: Glove base + fur → bean-shaped pads + claws (resin or foam).
- Feetcover: Slip-on boots with hoof shape.
7. Final Assembly, Fit & Testing (Week 34–40)
- Sew all parts together (zipper in back for entry).
- Add Velcro or snaps for removable parts.
- Test wear: walk, sit, dance for 1–2 hours. Adjust padding/hot spots.
- Ventilation: add mesh panels under arms/neck if needed.
Total Time: 300–600 hours (spread over 6–12 months) Total Cost: $400–$1,200 (DIY vs $3,000–$8,000 commissioned)
Common Mistakes to Avoid
- Using cheap craft fur (sheds badly, thin backing)
- Rushing foam carving (uneven head shape)
- Not testing fit early (suit too tight/loose)
- Skipping reference photos (proportions wrong)
Why Make Your Own Deer Fursuit in 2026?
- Save thousands compared to commissioning
- Learn skills (sewing, foam work, patterning)
- Full creative control over colors/antlers/details
- Huge sense of achievement when you wear it to a con
Ready to start your deer fursuit journey? If DIY feels too big, we can help with custom deer suits, heads, antlers, or partials – perfect for that forest-animal vibe.
FAQs
300–600 hours over 6–12 months for a beginner. Head alone takes 60–150 hours.
$400–$1,200 depending on quality of fur/eyes/antlers. Commissioned deer suits usually $3,000–$8,000+.
Hot glue gun, sewing machine, rotary cutter, Dremel/sandpaper, airbrush or paints.