Making your own therian mask is one of the most rewarding parts of therian gear crafting. It lets you express your theriotype (your animal identity) in a tangible way, helps with shifts, quadrobics, or just feeling more connected to your animal side. Whether you’re a beginner in Karachi with limited materials or have access to craft stores, this guide covers everything from scratch builds to customizing bases.
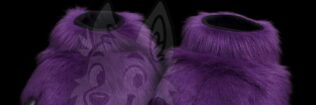
Therian masks are partial face coverings (usually covering the upper face, snout, and ears) made from affordable items like cardboard, felt, foam, faux fur, and mesh. They’re not full fursuits—they’re lightweight, DIY, and personal. No sewing machine needed for basics, though it helps for advanced versions.
This tutorial aims for 2500–3000 words, with beginner-friendly options (cardboard-only or low-cost), intermediate (felt/foam), and tips for popular theriotypes like fox, cat, or wolf. Safety first: ensure good vision (mesh eyes), ventilation, and no sharp edges.
Why Make Your Own Therian Mask?
- Affordable — Start under PKR 500–1000 using household items.
- Custom — Match your theriotype exactly (e.g., red fox markings, wolf mane).
- Therapeutic — Crafting reduces species dysphoria; wearing triggers mental/phantom shifts.
- Community — Share on TikTok, Reddit r/theriangear, or Discord—many therians bond over tutorials.
- Quad-friendly — Lightweight for running on all fours.
Common starting points: Buy a blank cat mask base (Amazon/Etsy, or local Saddar shops sell similar plastic/felt ones) or build from cardboard for zero cost.
Materials You’ll Need (Budget Options for Karachi)
Beginner (Cardboard-Only, ~PKR 200–500):
- Cardboard (old boxes, free from shops)
- Scissors/X-Acto knife (careful!)
- Hot glue gun + sticks (or PVA/Elmer’s glue)
- Acrylic paints/markers
- Elastic band (for straps)
- Mesh (old mosquito net, window screen, or buy cheap)
- Tape (duct/packing for shaping)
Intermediate (Felt/Foam, ~PKR 800–2000):
- EVA foam (craft stores, or yoga mat scraps)
- Felt sheets (various colors)
- Faux fur strips (or old clothes/fleece)
- Hot glue
- Paint (acrylic for details)
- Whiskers (wire/pipe cleaners/fishing line)
- Optional: Paper mache (flour + water + newspaper for smooth snout)
Advanced Add-ons:
- Faux fur fabric
- Resin/clay for noses
- Glow paint/LEDs
Tools: Pencil, ruler, hot glue gun (essential for speed), sandpaper (smooth edges).
Step-by-Step: Building from Scratch (Cardboard Base Method)
This is the most accessible—no premade base needed. Great for fox, wolf, or dog theriotypes with longer snouts.
Step 1: Design & Pattern (30–60 mins)
- Measure your face: Eye distance, forehead width, chin to nose.
- Sketch on paper: Oval face base + attached ears + snout tube.
- For cat/fox: Rounded face, pointy ears.
- For wolf/dog: Longer snout, fuller cheeks.
- Trace patterns: Cut paper templates for face, ears (x2), snout sides/top/bottom.
Step 2: Cut & Assemble Base (1–2 hours)
- Trace templates on cardboard.
- Cut carefully (use X-Acto for precision).
- Form snout: Roll cardboard into tube/cone, glue seams. Attach to face oval.
- Add ears: Fold tabs, glue to top.
- Reinforce: Glue extra strips inside for strength.
- Shape with tape/layers: Build up snout gradually for smooth curves (many use tape over cardboard for rounded look).
- Cut eye holes: Almond/round, position for vision. Cover with mesh later.
Step 3: Smooth & Strengthen (Optional Paper Mache, 1–2 days drying)
- Mix flour + water (paste).
- Dip newspaper strips, layer over base (2–3 layers).
- Dry fully (sun or fan).
- Sand rough spots.
Step 4: Cover the Base (Felting/Fabric, 1–3 hours)
- Cut felt/foam to fit face.
- Glue in sections (start center, work out to avoid wrinkles).
- For no-wrinkles felting: Stretch gently, glue small bits, overlap edges.
- Snout: Wrap fabric around, glue underside.
- Add fur accents: Glue faux fur strips for mane/cheeks/tufts.
Step 5: Details & Painting (1–2 hours)
- Paint base colors (e.g., orange for fox, gray for wolf).
- Add markings: Stripes, spots, scars with brushes/markers.
- Nose: Black felt/clay ball, glue on.
- Whiskers: Poke holes, insert wire.
- Eyes: Glue mesh inside (cut slightly larger than holes for safety).
- Ears: Layer inner color (pink/white), add tufts.
Step 6: Straps & Fit (15 mins)
- Punch holes sides.
- Thread elastic, knot/adjust for snug fit.
- Test: Wear, check breathing/vision/movement.
Step 7: Final Touches & Testing
- Add accessories: Feathers, gems, leaves.
- Wear in safe space—try shifts or quads.
- Store in box to avoid dust.
Variations: Fox Therian Mask Specifics
Foxes are super popular—cunning, agile vibe. Modify above:
- Snout: Longer/pointier than cat (extend cardboard cone).
- Colors: Orange/red base, white muzzle/underbelly, black ear tips/socks.
- Ears: Big, triangular with white inner.
- Arctic fox: White/gray fluffy felt, blue eyes.
- Fennec: Huge ears (extend foam), sandy colors.
- Kitsune twist: Add gold streaks, multiple “tail” accents on sides.
Many start with cat base, glue paper/foam extensions for fox muzzle (easy mod from tutorials).
Beginner Cat Mask (Using Premade or Simple Cardboard)
If cardboard feels hard, buy blank cat mask (plastic/felt, ~PKR 500–1000 online or local).
- Cover bald spots with foam/felt.
- Felt smoothly: Cut pieces, glue from center out.
- Paint details (tabby stripes, calico patches).
- Add fur tufts, whiskers.
Tips for Success & Common Mistakes
- Ventilation: Mesh eyes + open mouth if possible.
- Comfort: Lightweight—test for long wear.
- Wrinkles: Glue small sections, pull taut.
- Glue: Hot glue fast but burns—use low-temp or PVA.
- Budget in Karachi: Saddar/Bohri Bazaar for felt, foam, glue; recycled cardboard free.
- Safety: Adult supervision for knives/glue guns.
- Mistakes: Too heavy snout = neck strain; fix by reinforcing lightly.
Advanced Ideas
- Realistic nose: Sculpt clay, paint black/shiny.
- Glow: Add UV paint for night quads.
- Hybrids: Mix theriotypes (e.g., fox-wolf).
- Lining: Glue soft fabric inside for comfort.
Final Thoughts
Crafting a therian mask is about creativity and self-expression. Start simple—your first might be cardboard and paint, but it’ll feel authentic because it’s yours. Many therians say their handmade gear helps more than bought ones.
FAQS
Start with cardboard (free from boxes) or a cheap blank cat mask base (~PKR 500–1000 from online/local shops). Follow steps: sketch pattern, cut/assemble base, cover with felt/foam, paint details, add mesh eyes and elastic. Tutorials on YouTube (2025–2026 realistic tiger/coyote ones) and TikTok are great references.
Basics: Cardboard/EVA foam/felt, hot glue gun, scissors/X-Acto, acrylic paint/markers, mesh (mosquito net), elastic. For fox: faux fur strips (orange/white/black), pipe cleaners for whiskers. In Karachi, check Saddar/Bohri Bazaar for felt, glue, foam; recycle cardboard.
Extend the snout longer/pointier (cardboard cone or foam layers). Use orange/red base + white muzzle/underbelly + black ear tips. Add fluffy tufts, amber/green eyes. Modify cat bases easily—many 2025–2026 TikToks show red/arctic/fennec/kitsune versions.
🐾 🐾 🐾
✦ Commissions Open ✦Dream It. Fur It. Live It.
Get your custom fursuit, kemono suit, plush, or cosplay — handcrafted just for you. Free quote, no commitment!