Drawing your own furry character (or “fursona”) is one of the most exciting parts of joining the furry fandom. Whether you want to create reference sheets for a fursuit commission, make badges, plan expressions, or just have fun designing your perfect anthro animal, learning how to draw a furry is easier than you think – even if you’re a complete beginner.
This step-by-step guide is written for 2026: it works for both traditional (pencil/paper) and digital artists (Procreate, Clip Studio, Krita, Photoshop, etc.). By the end, you’ll be able to draw a clean, expressive furry character you can be proud of.
Step 1: Choose Your Species & Style
Every furry drawing starts with a decision.
Popular beginner-friendly species in 2026:
- Wolf – expressive ears & muzzle, lots of fur practice
- Fox – fluffy tail, sharp eyes, very popular
- Deer – elegant antlers, graceful body
- Cat – simple shapes, cute expressions
- Dragon – scales & wings for advanced practice
Choose a style:
- Toony (cartoon, big eyes, simple shapes) – easiest for beginners
- Realistic (detailed fur, anatomy) – more advanced
- Kemono / Chibi (anime-inspired, ultra-cute) – very popular right now
Tip: Start with toony – it’s forgiving and looks good even with small mistakes.
Step 2: Gather Your Tools (2026 Recommendations)
Traditional:
- Pencil (HB + 2B/4B for shading)
- Eraser (kneaded + precision)
- Paper (smooth sketchbook or Bristol board)
- Fine liners (Sakura Pigma Micron 0.3–0.8) for inking
Digital (free or low-cost):
- Krita (100% free, excellent for furries)
- FireAlpaca / Medibang Paint (free)
- Clip Studio Paint (one-time purchase or subscription)
- Procreate (iPad only, $12.99 one-time)
- Free brushes: Download “furry fur brushes” or “anthro texture” packs from DeviantArt or Gumroad
Step 3: Basic Furry Anatomy – The Head (Most Important Part)
Furry heads are human-like but with animal features.
Step-by-step head drawing:
- Draw a circle for the cranium.
- Add a smaller circle below for the muzzle (fox/wolf = longer, cat = shorter, deer = medium).
- Draw a cross on the face for eye placement (eyes sit higher than humans).
- Place large eyes (half the head height for toony style).
- Add ears – tall & pointed for wolves/foxes, rounded for deer, triangles for cats.
- Draw the neck – wider than human for fur volume.
- Add guidelines for fur direction (outward from center of face).
Common mistake: Making the muzzle too short/long – use real animal photos for reference.
Step 4: Adding Fur Texture & Details
This is what makes it look “furry”.
Techniques:
- Short strokes for short fur (muzzle, face)
- Longer wavy lines for fluffy areas (cheeks, neck, chest)
- Layer colors: base color → mid-tone → highlights → shadows
- Use white for chest blaze, ear insides, muzzle accents
- Add whiskers, nose shine, and small ear tufts
Digital tip: Use textured brushes (fur scatter, chalk, or custom fur brushes) and layer modes (Multiply for shadows, Overlay for highlights).
Step 5: Body & Poses
Furry bodies are anthro (human posture with animal traits).
Basic body proportions:
- Head = 1 unit
- Torso = 2–2.5 heads tall
- Legs = 3–4 heads tall (digitigrade = longer lower leg)
- Arms = reach mid-thigh
Poses for beginners:
- 3/4 view (most flattering)
- Arms at sides or hands on hips
- Slight lean or tail sway for personality
Digitigrade legs (animal stance):
- Bend knees backward
- Add calf padding shape
- Hooves or paw feet at bottom
Step 6: Hands, Feet, Tail & Accessories
- Hands: 4 fingers + thumb (paw pads optional)
- Feet: Plantigrade (human) or digitigrade (paw/hoof)
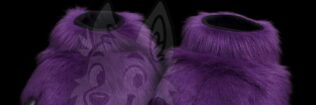
- Tail: Long & fluffy (fox/wolf), short & tufted (deer), expressive curves
- Accessories: collars, piercings, glasses, harnesses, clothing (shirts, jackets)
Step 7: Coloring & Shading
Simple method:
- Base color fill
- Add shadows (cooler tone, Multiply layer)
- Add highlights (warm tone, Screen/Overlay layer)
- Rim lighting (bright edge light)
- Color fur clumps individually for depth
Pro tip: Use color theory – complementary colors for eyes/nose to make them pop.
Step 8: Inking & Final Polish
- Ink with clean lines (digital: stabilizer on, traditional: fine liner)
- Add line weight variation (thicker on outside, thinner inside)
- Background: simple gradient or forest/pattern
- Export high-res (300 DPI for printing ref sheets)
Common Beginner Mistakes & Fixes
- Flat-looking fur → add direction & layering
- Stiff pose → use gesture drawing (30-second sketches first)
- Wrong proportions → use Loomis head method + animal refs
- Overcrowded design → keep it simple for first fursona
- Bad hands → practice paw tutorials separately
From Drawing to Fursuit – Next Steps
Once your furry drawing is finished:
- Turn it into a full reference sheet (front, back, side, expressions)
- Use it to commission a fursuit, badge, or plush
- Share on FurAffinity, X, Reddit r/furry, or Discord for feedback
Ready to bring your furry drawing to life as a fursuit? We specialize in turning 2D fursona art into 3D wearable suits – partials, fullsuits, heads, tails, and accessories. Send us your drawing and we’ll give you a fast, accurate quote.
FAQs
No – start with basic shapes and animal references. Most people see big improvement in 1–3 months with daily practice.
Both work. Digital is easier to fix mistakes (undo button), traditional helps you learn fundamentals better.
Yes – most makers love clear ref sheets. We can work directly from your art.
🐾 🐾 🐾
✦ Commissions Open ✦Dream It. Fur It. Live It.
Get your custom fursuit, kemono suit, plush, or cosplay — handcrafted just for you. Free quote, no commitment!